This article shows how to use a ToF sensor with Raspberry Pi.
ToF sensor (VL53L1X) was controlled by I2C communication from Raspberry Pi.
Contents
- Parts required to use a ToF sensor
- Connection of each parts
- Python sample code
- Operation check of ToF sensor
sponsored link
Parts required to use a ToF sensor
In the beginning, I show parts required to use a ToF sensor.
ToF sensor
I bought a module with VL53L1X at Switch Science.
( Sorry, link to Japanese shop )
Specifications of ToF sensor.
- Size : 13 × 18 × 2 mm
- Weight : 0.5 g
- Resolution : 1mm
- Max range : 400cm
- Min range : 4cm
- Interface : I2C
- Min operating power : 2.6V
- Max operating power : 5.5V
- Power supply current : 15mA
Alternatives on Amazon US.
Breadboard
This breadboard is a best seller on Amazon.
Jumper wire
This product is a set of male-male, male-female, and female-female.
sponsored link
Connection of each parts
From here, I show how to connect each part.
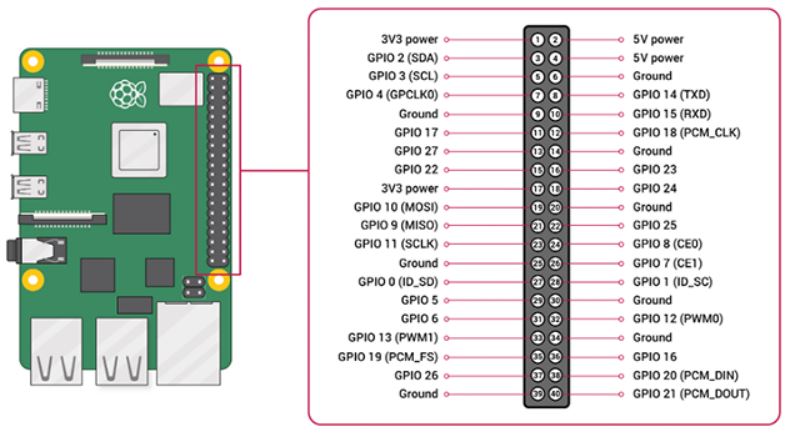
GPIO and the 40-pin Header on Raspberry Pi 4
Here is the pinout of the Raspberry Pi.
quotation : Raspberry Pi Documentation
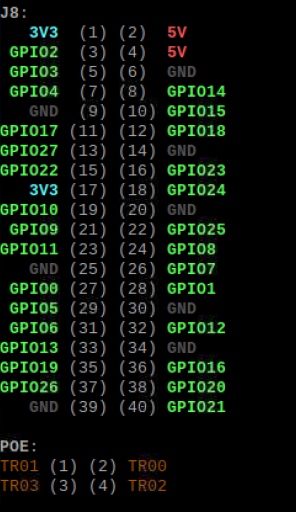
The pinouts of the Raspberry Pi can also be viewed by using the terminal.
Enter the following command in the terminal and the pinouts of the Raspberry Pi will be displayed.
$ pinout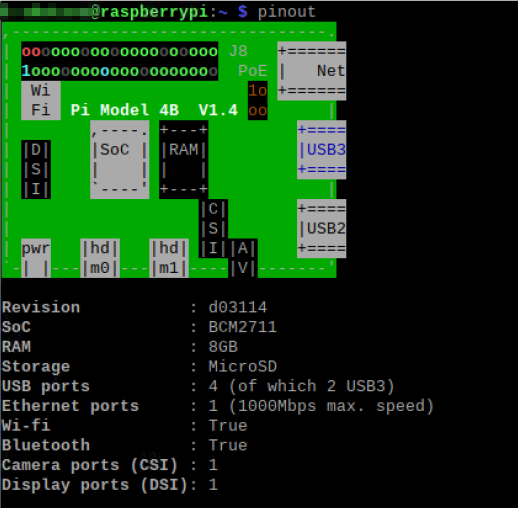
Since I2C communication is used, PIN numbers 3(SDA) and 5(SCL) are used.
Connection of each part
I show the wiring diagram of the ToF sensor and the Raspberry Pi.
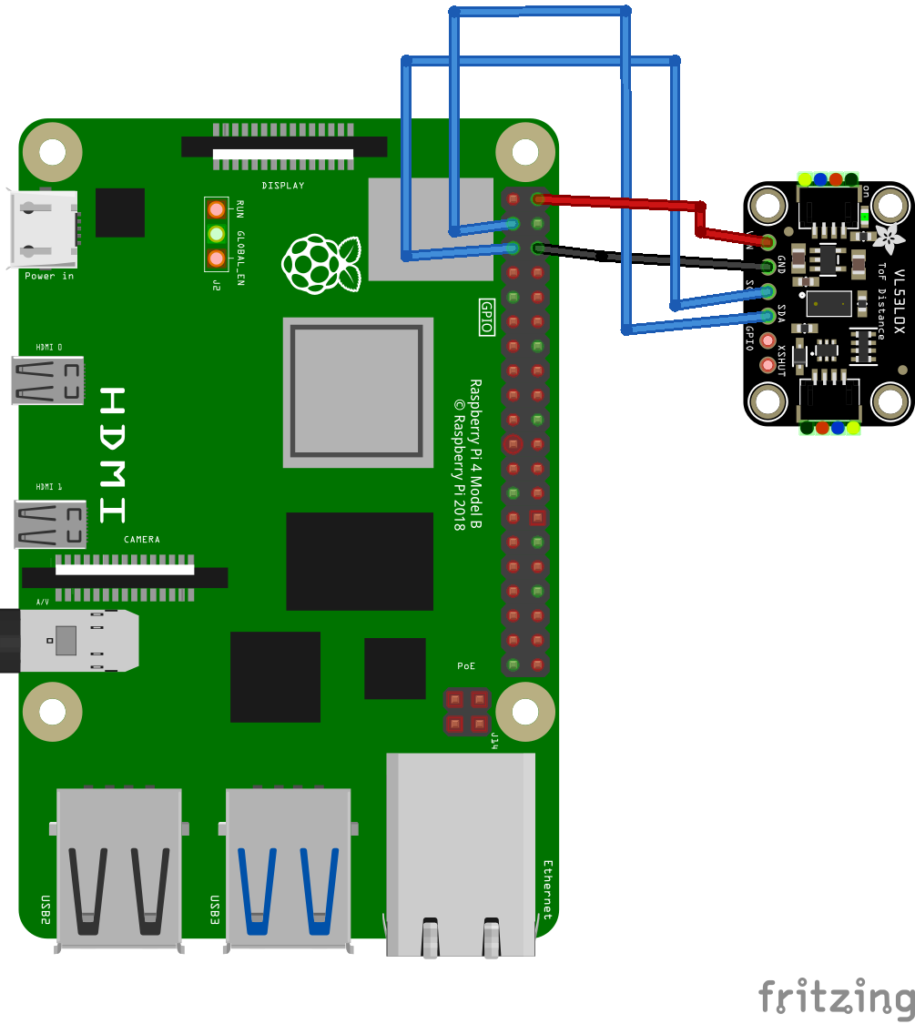
Connect SDA and SCL between the ToF sensor and the Raspberry Pi.
The 5V output of the Raspberry Pi is used to power the ToF sensor.
Do not forget to connect GND as well.
Here is a picture of the wiring.
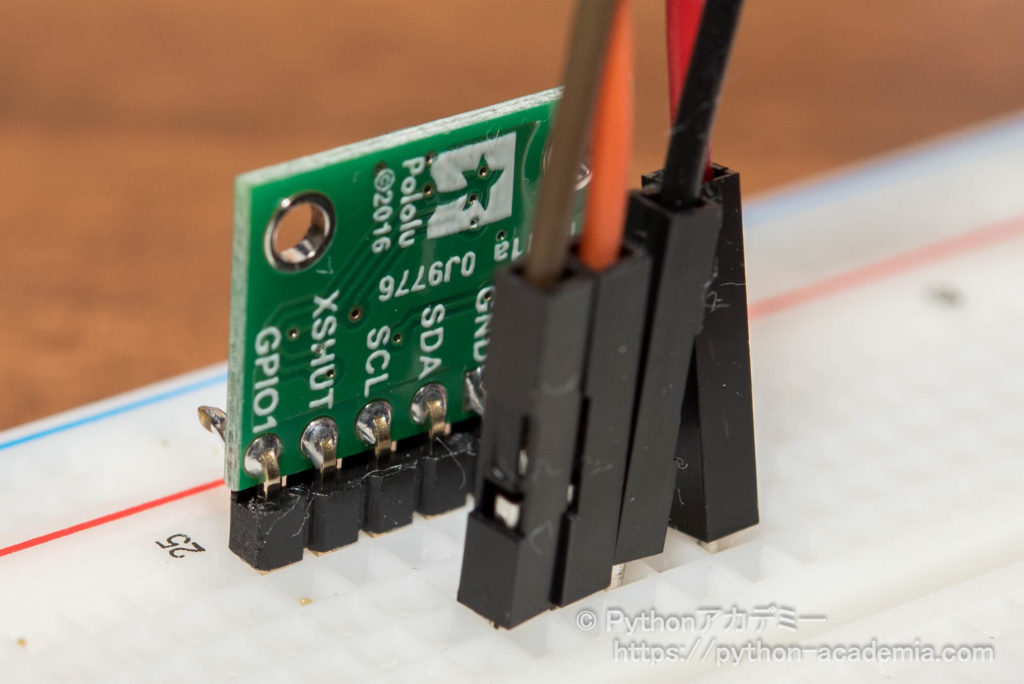
Here is a picture of the front of the ToF sensor.
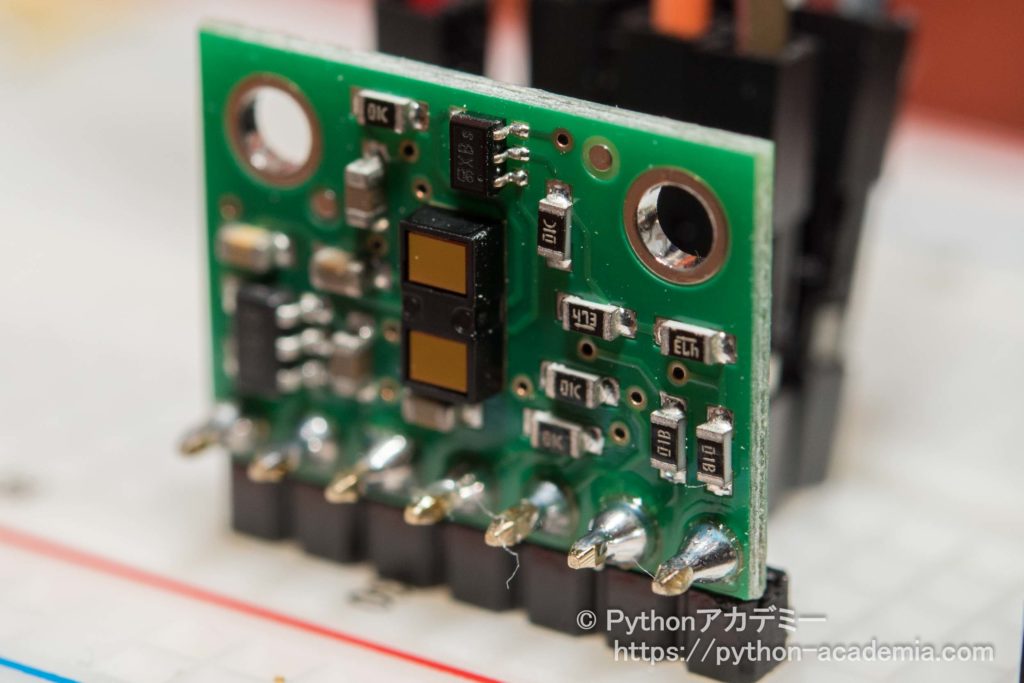
Note that a ToF sensor may have a protective sticker on it if you just bought it.
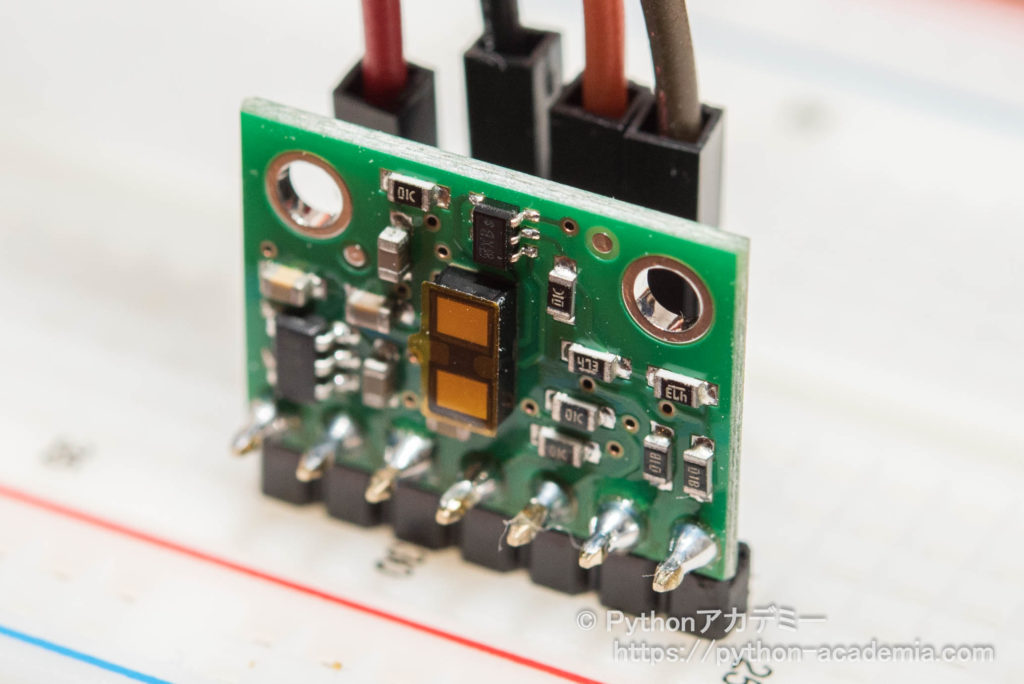
Here is a picture of the ToF sensor after the protective sticker has been removed.
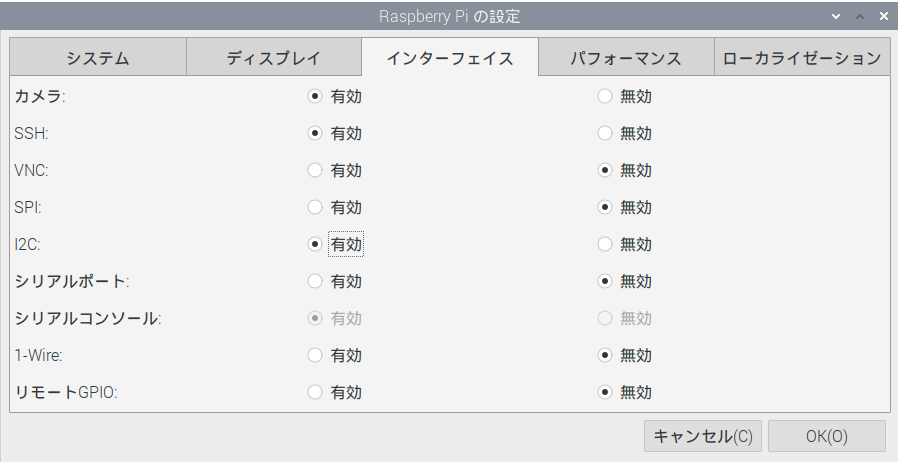
Enable I2C communication on the Raspberry Pi.
Enable I2C communication on the Raspberry Pi.
Go to "Preferences" > "Raspberry Pi Configuration".
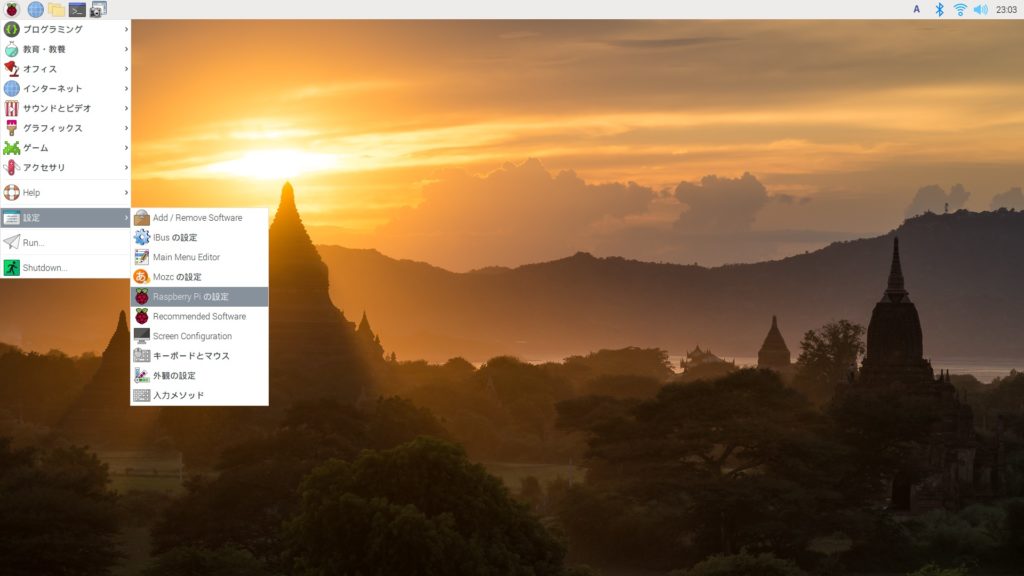
( Sorry, Japanese is included. )
On the Interface tab, enable "I2C".
( Sorry, Japanese is included. )
I2C communication is available on Raspberry Pi.
Check the I2C address of the ToF sensor
Check the I2C address of the ToF sensor.
Enter the following command in the terminal.
$ sudo i2cdetect -y 1If the following image is displayed, the I2C communication is established.
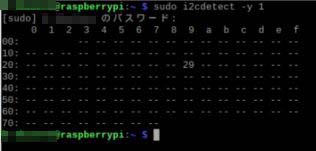
Channel 0x29 can be used for communication with a ToF sensor.
sponsored link
Python sample code for using a ToF sensor
I show Python sample code for using a ToF sensor.
Install the library for VL53L1X
The library for VL53L1X must be installed in advance.
Enter the following command in the terminal to install the library.
$ sudo pip3 install vl53l1x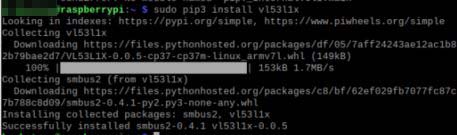
Python sample code
Here is a sample code to use a ToF sensor with Raspberry Pi.
### Sample code

import VL53L1X
import time

tof = VL53L1X.VL53L1X(i2c_bus=1, i2c_address=0x29)
print("Python: Initialized")
tof.open()
print("Python: Opened")


time_start = time.time()

try :
    while True:


        ### ------------------- get_time ----------------- ###

        time_end = time.time()
        time_elapsed = time_end - time_start

        print("")
        print("--- Time : {:.1f}s ---".format(time_elapsed))


        ### ------------------- get_distance ----------------- ###

        ### --- Short Range --- ###
        tof.start_ranging(1)    # 1 = Short Range
        distance_mm = tof.get_distance()
        print("Short Range Distance: {}mm".format(distance_mm))
        tof.stop_ranging()

        ### --- Medium Range --- ###
        tof.start_ranging(2)    # 2 = Medium Range
        distance_mm = tof.get_distance()
        print("Medium Range Distance: {}mm".format(distance_mm))
        tof.stop_ranging()

        ### --- Long Range --- ###
        tof.start_ranging(3)    # 3 = Long Range
        distance_mm = tof.get_distance()
        print("Long Range Distance: {}mm".format(distance_mm))
        tof.stop_ranging()


        time.sleep(1)

except KeyboardInterrupt:
        print("\nCtrl+C")
sponsored link
Operation check of ToF sensor
This video shows a ToF sensor being used to measure distance.
VL53L1X has three measurement modes.
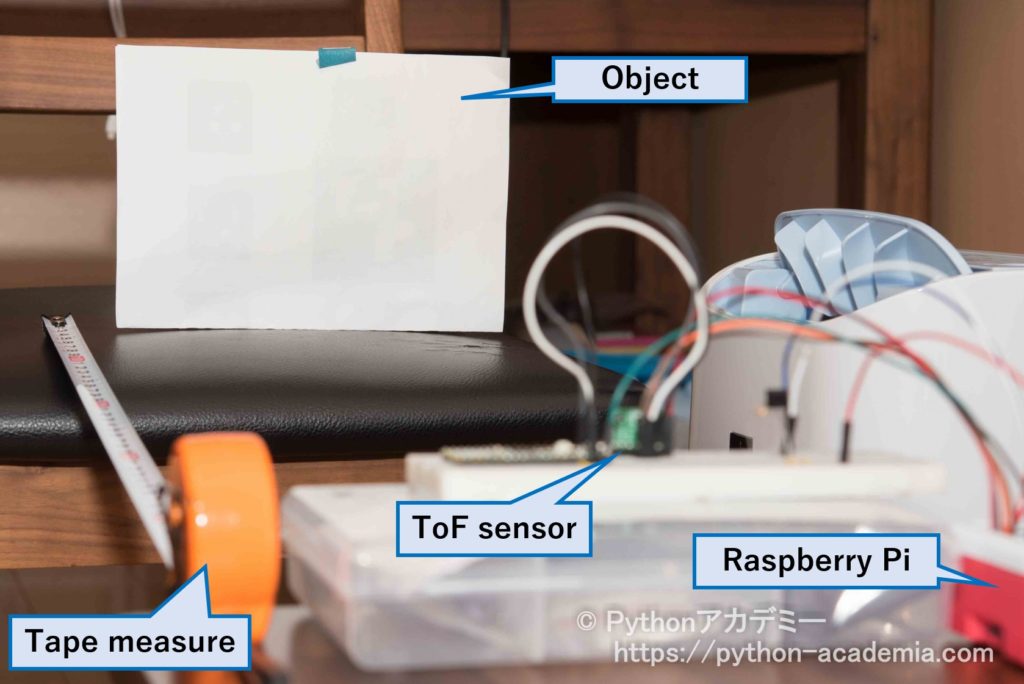
To confirm the characteristics of each ranging mode, I conducted a simple experiment.
Here is a picture of the experimental environment.
Here are the measurement results.
| Short Range | Medium Range | Long Range | |
|---|---|---|---|
| 50cm | 47.6cm | 47.5cm | 46.2cm |
| 100cm | 96.9cm | 99.2cm | 99.8cm |
| 150cm | 154.9cm | 156.1cm | 157.1cm |
| 200cm | 184.1cm | 189.5cm | 192.2cm |
| 250cm | 204.5cm | 217.8cm | 235.1cm |
| 300cm | 166.9cm | 205.2cm | 255.4cm |
When the object distance was close, there was no difference between modes, but when the object distance exceeded 250 cm, an error became larger by using the Short Range mode.
This result is expected to vary depending on the reflectivity of the subject and its shape.
sponsored link